
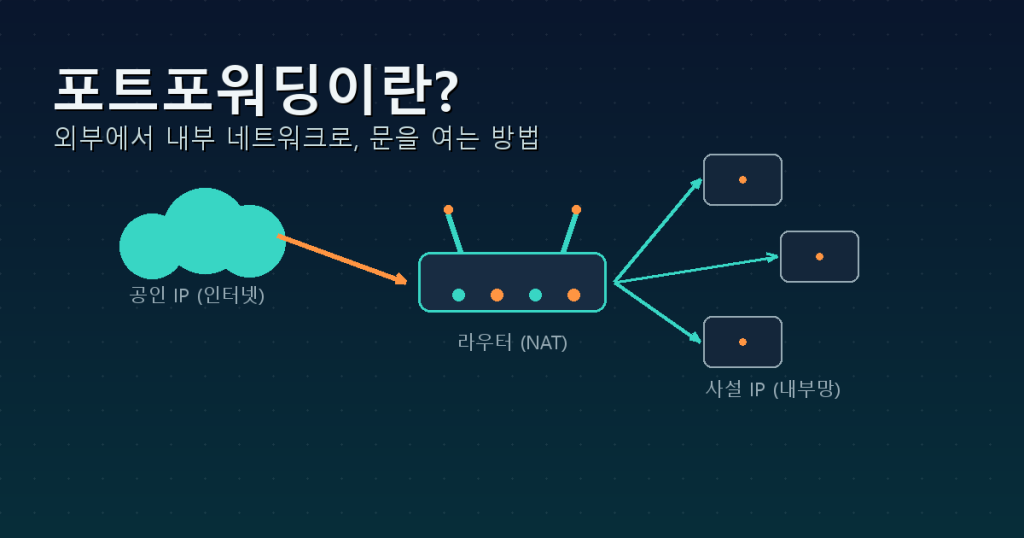
If you’ve ever set up a NAS, a home security camera, or a personal game server, you’ve probably run into the term “port forwarding” somewhere in the setup guide. It sounds technical, but the idea behind it is simple once you break it down. In this guide, we’ll walk through what port forwarding actually does, why so many services need it, how to configure it on a typical home router, and the security precautions you should take before opening any ports.
What Is Port Forwarding, Really?
To understand port forwarding, you first need to understand the difference between a public IP address and a private IP address. Think of your public IP as the street address of an apartment building, and private IPs as the individual unit numbers inside that building. From outside on the internet, only the building’s address is visible — nobody outside can tell how many units are inside or which unit is which.
Your home or office router plays the role of the building’s front desk. A single internet connection, and a single public IP, comes into the router, and every device behind it — your laptop, phone, NAS, or camera — gets its own private IP address. The technology that lets many devices share one public IP is called NAT (Network Address Translation).
By default, NAT only allows connections that start from the inside going out. Browsing a website or streaming video works fine because your device initiated the connection. But if someone outside tries to reach your NAS or camera directly, the router has no idea which internal device that traffic is meant for, so it simply drops it — there’s no instruction telling the front desk which unit to send the visitor to.
Port forwarding is exactly that instruction. It tells the router: “Any request coming in on port X should be sent to this specific private IP address inside the network.” Once that rule is in place, anyone outside can reach a specific device or service inside your network using just your public IP and the port number.
Why Would You Need Port Forwarding?
Port forwarding shows up in a surprisingly wide range of everyday situations:
- Remote Desktop: connecting to your home PC from the office or while traveling
- Home NAS: accessing files stored on your home server while you’re away
- IP cameras: checking a live feed from a store or home camera remotely
- Game servers: hosting a multiplayer server on your own PC for friends to join
- Personal web servers: running a hobby website or blog from a home PC without paid hosting
What all of these have in common is the same underlying need: something inside your private network has to be reachable from the outside world through a specific, predictable port.
How to Set Up Port Forwarding on Your Router
Every router manufacturer has a different-looking admin interface, but the underlying steps are almost always the same:
- Log into your router’s admin page. This is usually done by typing 192.168.0.1 or 192.168.1.1 into your browser and signing in with the router’s admin credentials.
- Assign a fixed private IP to the device you want to forward traffic to. Since DHCP-assigned addresses can change after a reboot, use the router’s “static IP” or “address reservation” setting to lock in that device’s private IP.
- Find the “Port Forwarding” or “Virtual Server” section in the admin menu.
- Add a new rule specifying the external port, internal port, internal IP address, and protocol (TCP/UDP). The service you’re setting up will usually tell you which port numbers to use.
- Save the rule and, if needed, restart the router or wait for the change to take effect.
Once that’s done, you can test the connection from outside using your public IP and the external port you chose. Keep in mind that if your internet plan uses a dynamic IP, your public IP may change periodically — pairing your setup with a DDNS (Dynamic DNS) service lets you keep using the same address even after your IP changes.
Security Considerations Before You Open a Port
Port forwarding opens a door from the public internet straight into your network, so a few precautions matter.
Only open the ports you actually need. Leaving extra ports open “just in case” only gives attackers more paths to try. Get in the habit of removing rules for services you no longer use. It’s also worth reviewing your router’s and devices’ firewall rules alongside your port forwarding setup, restricting access by IP or protocol wherever possible for an extra layer of protection. And the basics still matter: change the router’s default admin password, and use strong, unique passwords for whatever service you’re exposing.
If opening inbound ports isn’t something you’re comfortable with — or your organization’s security policy simply won’t allow it — there’s another way to get the same remote access without touching your router’s firewall at all. Remote control SaaS platforms like WYRemote work by having the internal PC initiate an outbound connection to the service first, so you never need to open an inbound port on your router to reach it from outside. If port forwarding feels risky or cumbersome for your situation, it’s worth considering that alternative.
At its core, port forwarding is just a signpost that tells incoming traffic exactly where to go inside your network. Once you understand the underlying logic, you can apply it to any service you want to expose — just make sure you’re opening only what you need, and keeping an eye on what’s listening on the other side.
If you run into this often, it’s worth checking out Y-Remote, a browser-based remote control SaaS that needs no VPN or port forwarding.